Call recording (Desktop)
There are 4 different call recording permissions which can be configured depending on your organisation, these are:
Always on
All calls recorded by default with no option to Pause/Stop
Pause/Resume
All calls recorded by default with available option to Pause/Resume
On-Demand
All recording off as default. Once started user has the option to pause/resume (but not stop)
On-Demand UIS
All recording are off as default with the option to start/pause/resume at any point
Call recording with Always on permission
Step 1:
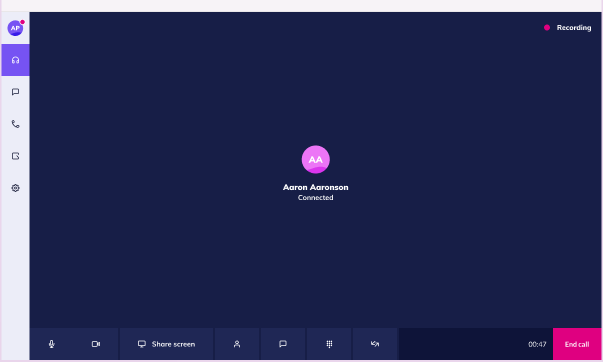
Once call recording has been enabled, users should be presented with the “Recording” status in the top right once a call has either been initiated or answered.
Step 2:
As an End user with Call Recording Always on enabled, there are no other options available. To end the recording simply end the call.

Call recording with Pause/Resume permission
Step 1:
Once call recording has been enabled, users should be presented with the “Recording” status in the top right once a call has either been initiated or answered.

Step 2:
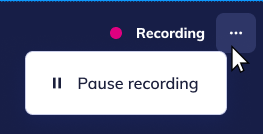
To pause the recording, select the 3 dots (options) and select the “Pause Recording” function.
Step 3:
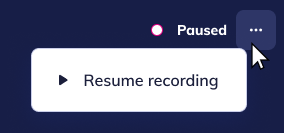
Clicking “Resume Recording” from the 3 dot (options) will re-start the recording and will revert the status from “Paused” back to “Recording”.

Step 4:
To end the recording simply end the call.
Call recording with On-Demand permission
Step 1:
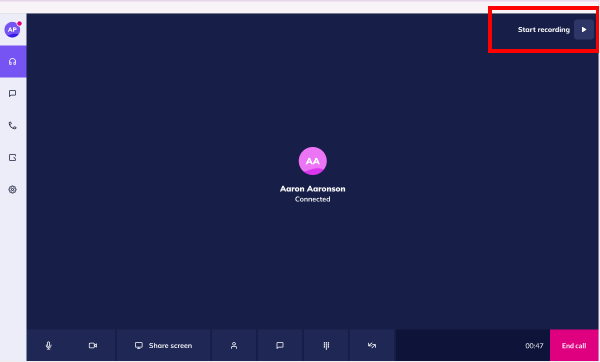
Once call recording has been enabled, users should be presented with the “Start Recording” button available in the top right once a call has either been initiated or answered.
Step 2:
Select the “Start Recording” button to begin the recording. Clicking this will change the state to “Recording”.
Step 3:
To pause the recording, select the 3 dots (options) and select the “Pause Recording” function.
Step 4:
Clicking “Resume Recording” from the 3 dot (options) will re-start the recording and will revert the status from “Paused” back to “Recording”.
Step 5:
To end the recording simply end the call.
Call recording with On-Demand UIS permission
Step 1:
Once call recording has been enabled, users should be presented with the “Start Recording” button available in the top right once a call has either been initiated or answered.
Step 2:
Select the “Start Recording” button to begin the recording. Clicking this will change the state to “Recording”.
Step 3:
To pause the recording, select the 3 dots (options) and select the “Pause Recording” function.
Step 4:
Clicking “Resume Recording” from the 3 dot (options) will re-start the recording and will revert the status from “Paused” back to “Recording”.
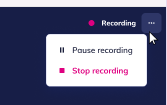
Step 5:
Clicking “Stop Recording” at any time will stop the recording and then change the status back to “Start Recording” as shown below.